-from Super User
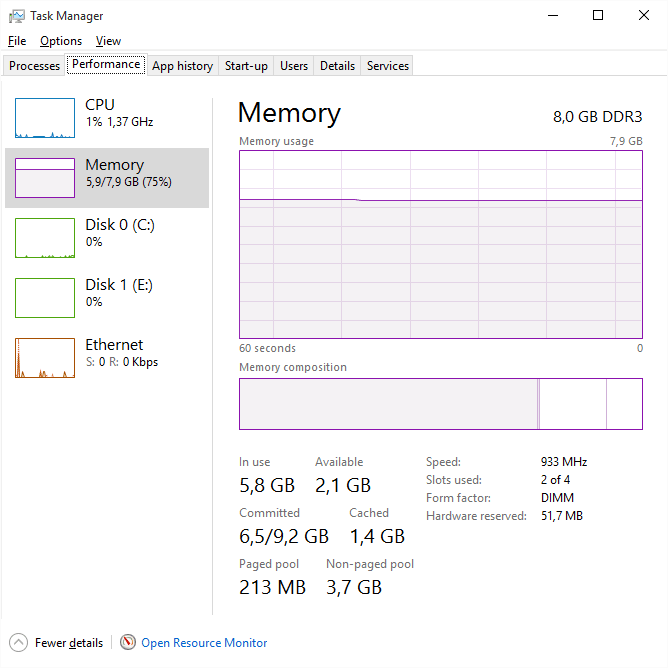
When we upgrade my computer to Windows 10, some of the computer users have to face the problem with the high CPU/RAM/Memory usage. The issue has a bad effect on the usual usage of computer. Consequently, we should try the best to fix that problem. In this article, we are going to talk about how to fix high RAM usage after Windows 10 update with 5 efficient solutions.
Solution 1: Adjust Windows 10 for Best Performance
Since your Windows 10 computer does not well in performance. Then you need to adjust its performance. How to do that? There is an option in Windows 10. Follow the steps as below:
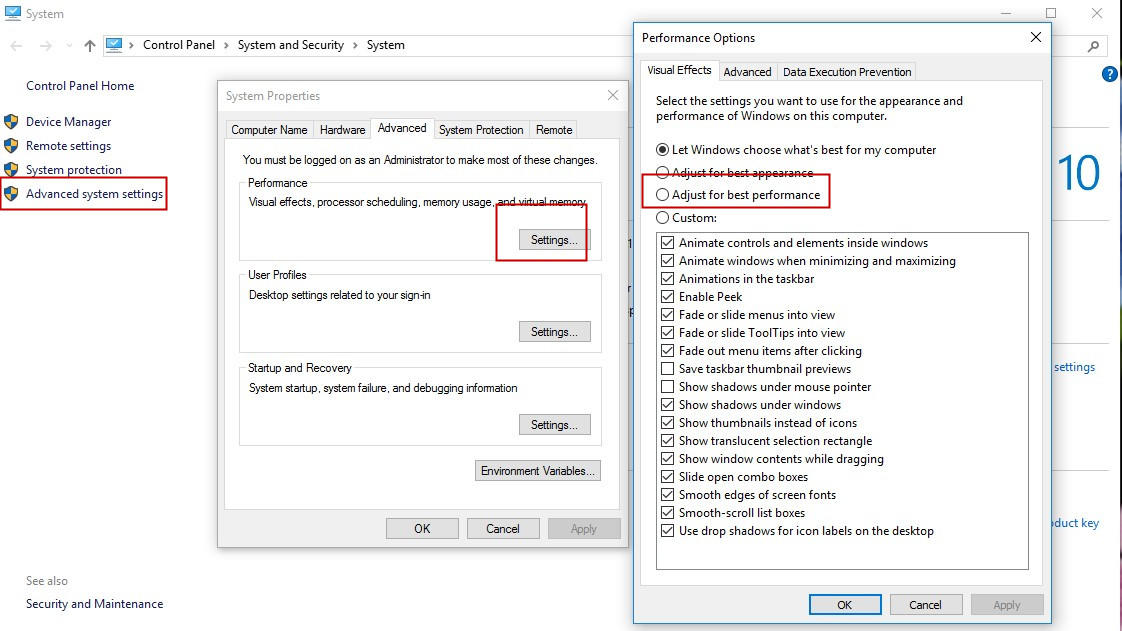
1. On the desktop of Windows 10, right click on “This PC” icon and choose “Properties” option. If there’s no icon on desktop, just search “this pc” in the search menu.
2. It will pop up a window that is Control Panel Home. Just hit the “Advanced system settings” in the left side.
3. Then it will show the “System Properties” window, just click on “Settings…” of the “Performance” option.
4. In the pop up “Performance Options”, click on the “Adjust for best appearance” selection. Then tap “OK” button to finish the process.
Solution 2: Disable “Hey Cortana”
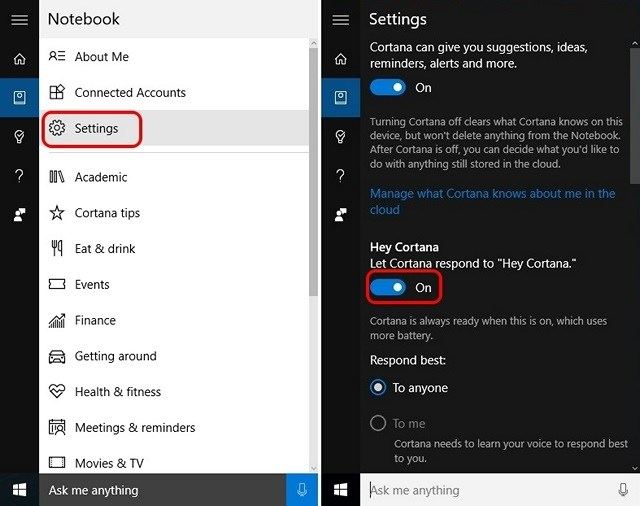
The new function “Hey Cortana” in Windows 10 may be one of the reasons to lead high RAM usage. Then we can try to close it. Just open “Cortana” and hit it. Then go to “Notebook” >> “Settings” and then turn off “hey Cortana”.
Solution 3: Switch off Windows Spotlight
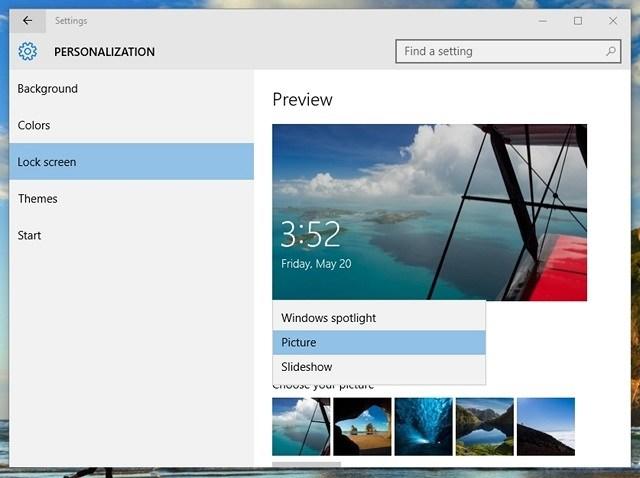
You can also disable Windows Spotlight because it occupies resources. Just following the tips as below: Search “Settings” from the start menu. Then type “Settings” >> “Personalization” >> “Lockscreen” and change the background from “Windows Spotlight” to “Picture” or “Slideshow”.
Solution 4: Turn off Windows 10 Tips
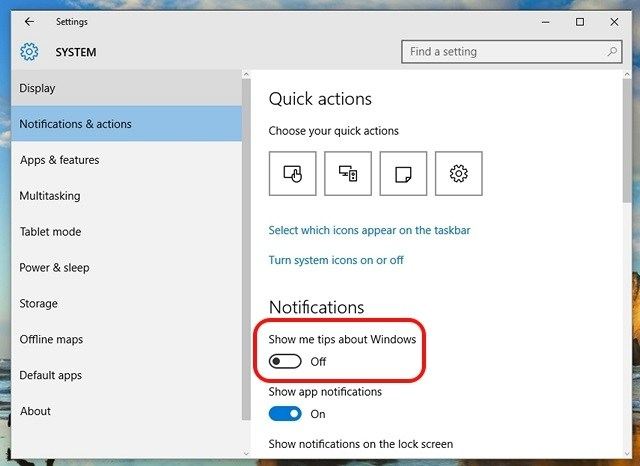
To turn off Windows 10 tips, just search “Settings” on the search box, where is in the left bottom of the computer desktop. Then tap on “System” >> “Notifications and actions” >> “Notifications” >> turn off “Show me tips about Windows”.
Solution 5: Fix High RAM Usage with Windows Care Genius
Windows Care Genius is a professional tool that is designed to optimize the slowly computer with ant data loss. You could use it to check your computer’s performance within several minutes. Apart from this, it is also a world’s leading pc cleaning and speed up tool.
You can see the brief user guide as below:
1. Download and install Windows Care Genius and then launch it to your Windows-based computer. Then you are about to see the main interface of this powerful software.
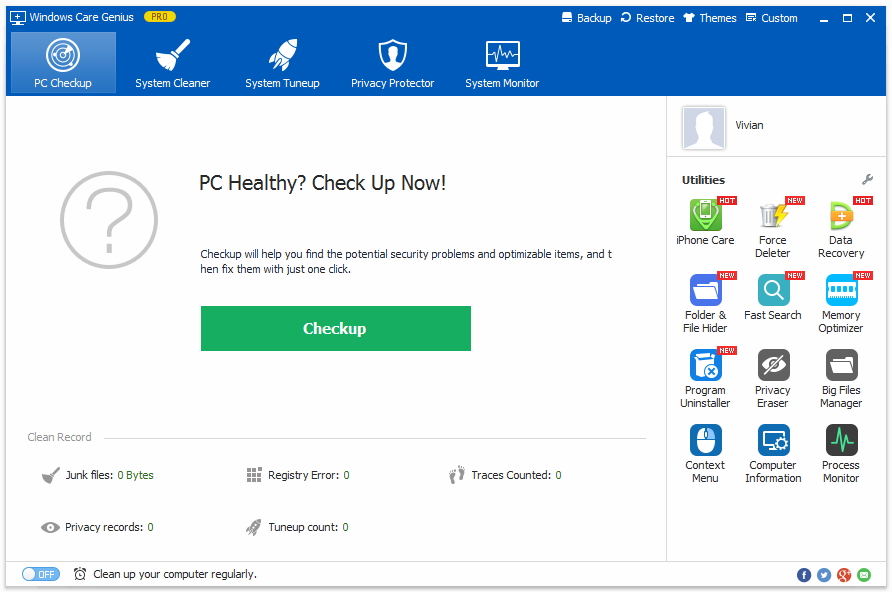
2. After that, just click the “Checkup” button to check the computer’s performance including CPU, RAM and Memory.
3. For 5 minutes or so, you can see the scan result. Just tap on the “Fix” button and then the program will begin to repair Windows 10 high CPU/RAM/Memory usage issue.
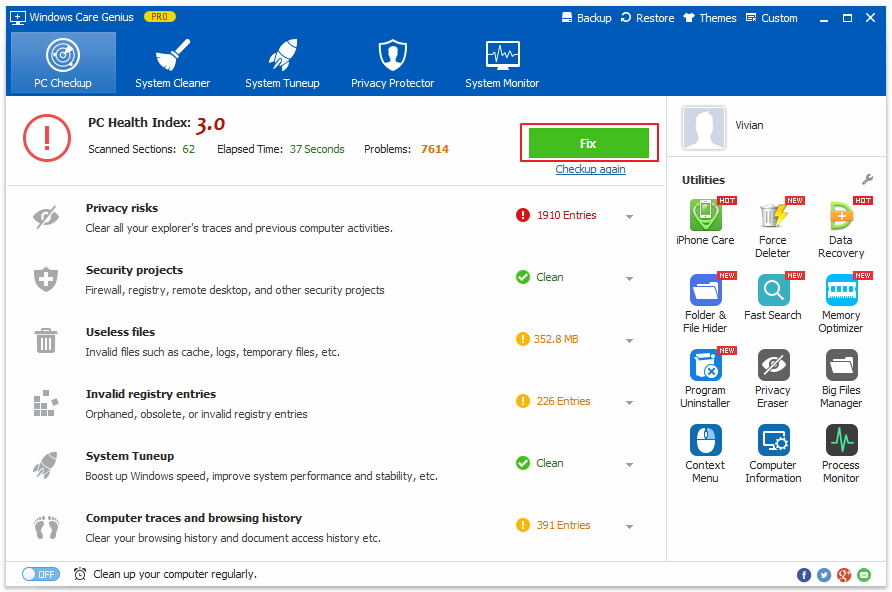
4. After that, it will show the new score of your system detection. You can also click the “Checkup again” link directly or just go to the main interface and click the green “Checkup” button to make a grade for your computer.

That’s the cool process of how to fix high RAM leakage after Windows 10 PC update in practical method. Just imagine that when your Windows 10 computer runs well, it would be quite a happy thing. If you get any further question about using Windows 10, just click to this webpage. Get any unforgettable experience in CPU/RAM/Memory usage? Welcome to share it with us in the comment box.