Most Windows users have doubts on whether to enable or disable Superfetch in Windows 10, as it is said that superfetch/prefetch may lead to sluggish performance, getting out of memory error of PC. Also related terms like 'RAM' or 'HDD', 'SDD' would drive you crazy. Therefore, this article would like to answer question about Superfetch and offer solution to turn on or turn off Superfetch on Samsung, HP, Dell, Toshiba, IBM, etc with Windows 10.
Part 1. What exactly is Windows 10 Superfetch?
Part 2. Should Superfetch be on/off in Windows 10?
Part 3. How to turn on/off Superfetch in Windows 10?
Part 4. How to Free and Speed Up Windows 10 Efficiently?
Part1. What exactly is Windows 10 Superfetch?
SuperFetch is a service that was introduced with Vista and has been part of Windows ever since to improve system responsiveness. It tries to speed up your Windows 10 PC by pre-loading parts of programs you use frequently and pre-loads them into fast RAM (random access memory) so that they don't have to be called from slow hard disk drive (Also HDD. It is the alternative to SSD, but SSD is modern and much faster) into memory. The disadvantage was that there was less RAM available to programs but you will gain in better speed.
Part2. Should Superfetch be on/off in Windows 10?
After you know the general idea of Superfetch, whether to turn on or turn off it comes as a problem. We recommend that it depends on your user experience. If turning on the Superfetch won't decrease or degrade your PC's running speed or storage, or you are enterprise users (computer game player) and big data base is frequently needed, or your PC is in SSD installation, you can leave it as it is. However, for personal users, or the one who feel it an obstacle for occupying too much storage place, you are advised to turn it off.
Part3. How to turn on/off Superfetch in Windows 10?
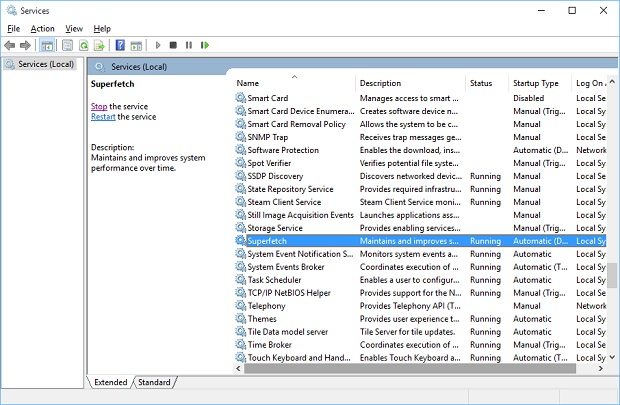
Step1. Run services.msc to open the Services Manager. Scroll down to Superfetch service.

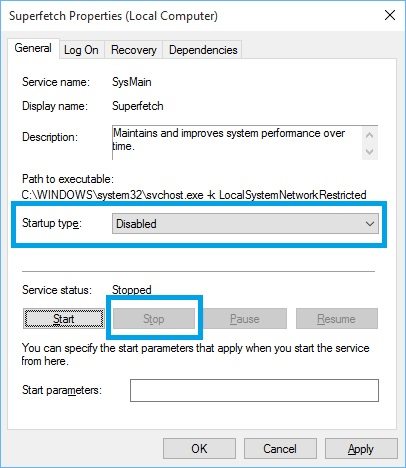
Step2. Double-click on it to open Properties box. Click on Stop to end the process. Make the startup type Disabled and click on Apply.

Step3. Click OK and exit the Services Manager. Restart your Windows 10 PC to finish the process.
If you want to optimize your Windows 10 PC for better performance with Superfetch without occupying too much space in RAM, you are also highly recommended to use world's leading PC cleaning and speed up tool Windows Care Genius to help free your Windows storage. As you have more questions, please feel no hesitate to leave your questions on the comment section below. Thank you.
Part 4. How to Free and Speed Up Windows 10 Efficiently?
If you want to optimize your Windows 10 PC for better performance with Superfetch without occupying too much space in RAM, you are also highly recommended to use world's leading PC cleaning and speed up tool Windows Care Genius to help free your Windows storage and speed up Windows 10 increasingly.
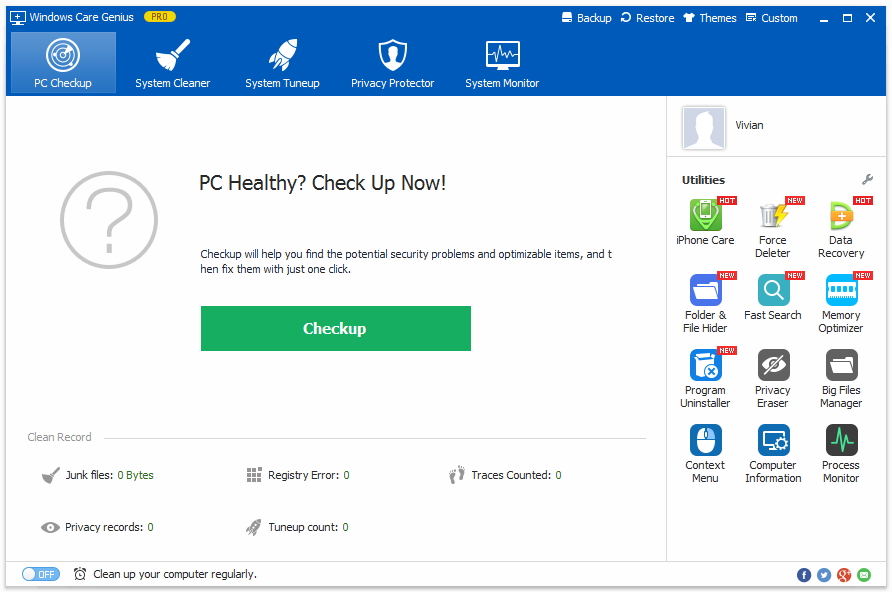
- Run Windows Care Genius and click “Checkup” button, then the software will automatically check your computer find the potential problems.
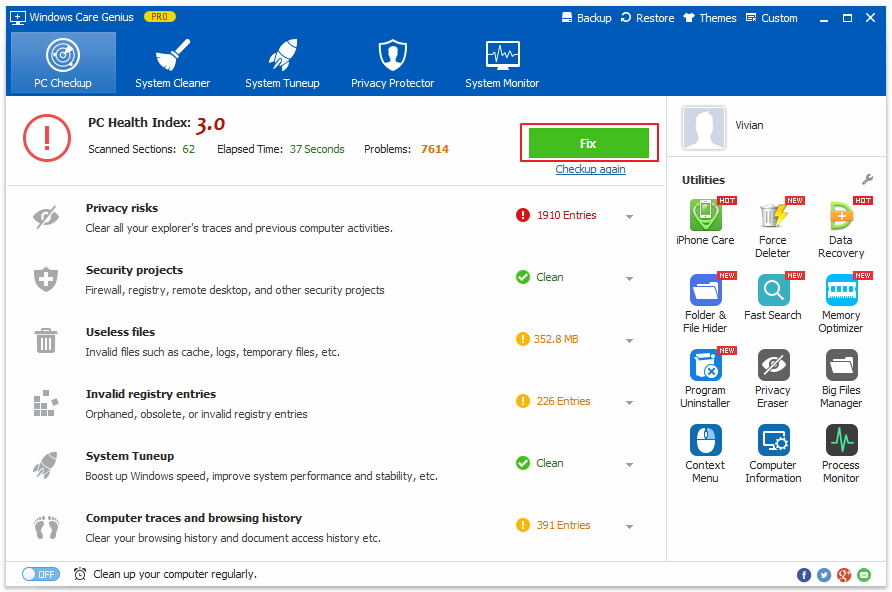
- After scanning, It will list the whole health state of your PC and the existing junk files, useless files and invalid registry entries on your PC. Click “Fix” button to clean up all of them in one click.


As you have more questions, please feel no hesitate to leave your questions on the comment section below. Thank you.