UltData (iOS Data Recovery for Mac) can help you recover deleted contacts, photos, text messages, call history, notes, and more data from iOS devices(iPhone, iPad and iPod) on Mac platform. This software provides 3 recovery modes, allowing you to recover lost data under any situation. They are: Recover Data from iOS Device, Recover Data from iTunes Backup and Recover Data from iCloud Backup. Now you can see how to use these modes to recover lost or deleted data in iOS device as below.
Recover Data from iOS Device
This mode enables you to recover data directly from your device without backup. As long as your device can normally turn on, even it is passcode-protected, the data on it can be retrieved.
Note: You'd better switch your device to airplane mode and not use your device as soon as you realize you lost data. Any operation on your device will generate new data, which can overwrite your lost data and make them unrecoverable.
Step 1: Connect iOS device to Mac
Download, install, and run the UltData (iOS Data Recovery for Mac) on your Mac, and then connect your device via a USB cable.
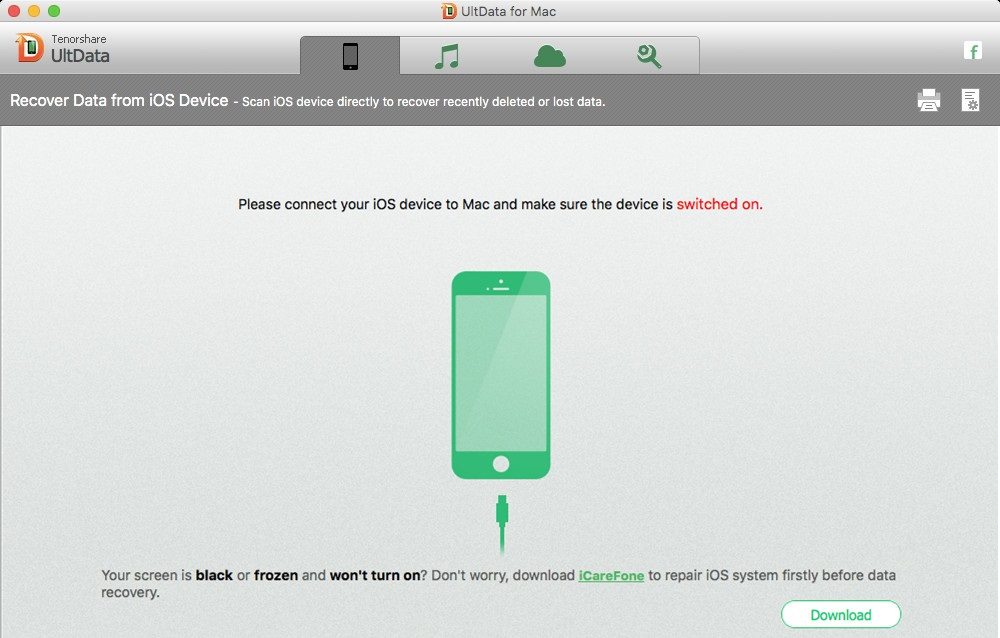
Note: If your iOS device won't turn on, boot up, stuck at Apple logo or appears like black screen, you can click iCareFone link and download it to repair iOS system firstly before recovering data. If your iOS device gets stuck in recovery mode, you can click the "Exit Recovery Mode" button to fix it before scanning data.
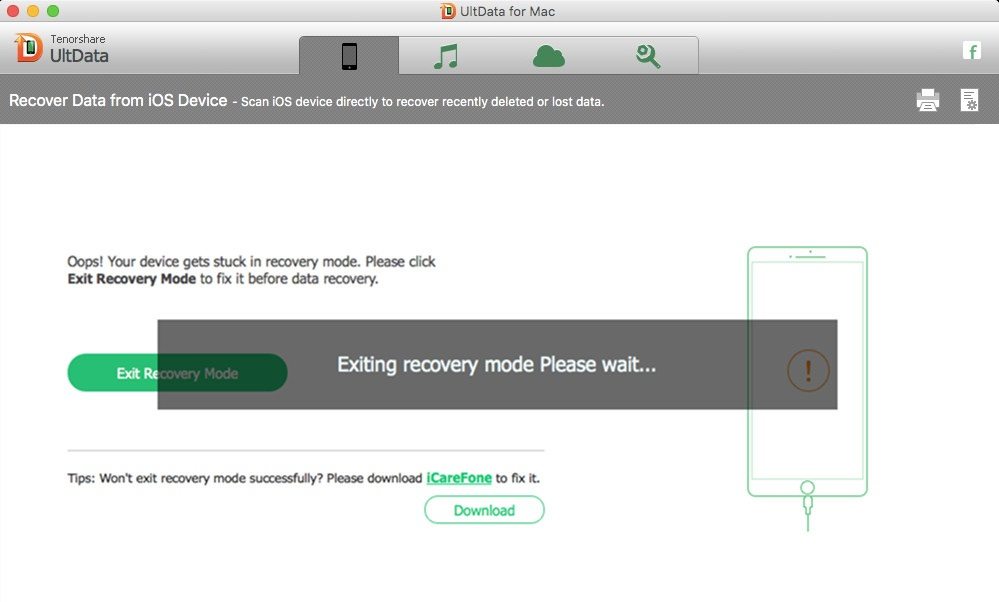
If your iOS device gets stuck in recovery mode, you can click the "Exit Recovery Mode" button to fix it before scanning data.
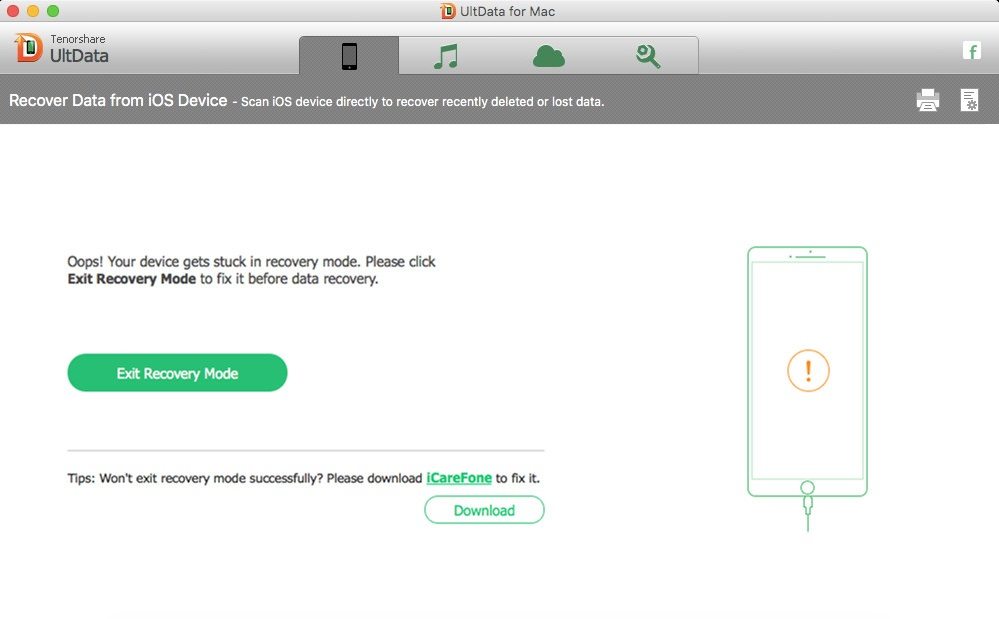
Now you can wait for a few seconds to get your iOS device exiting recovery mode.
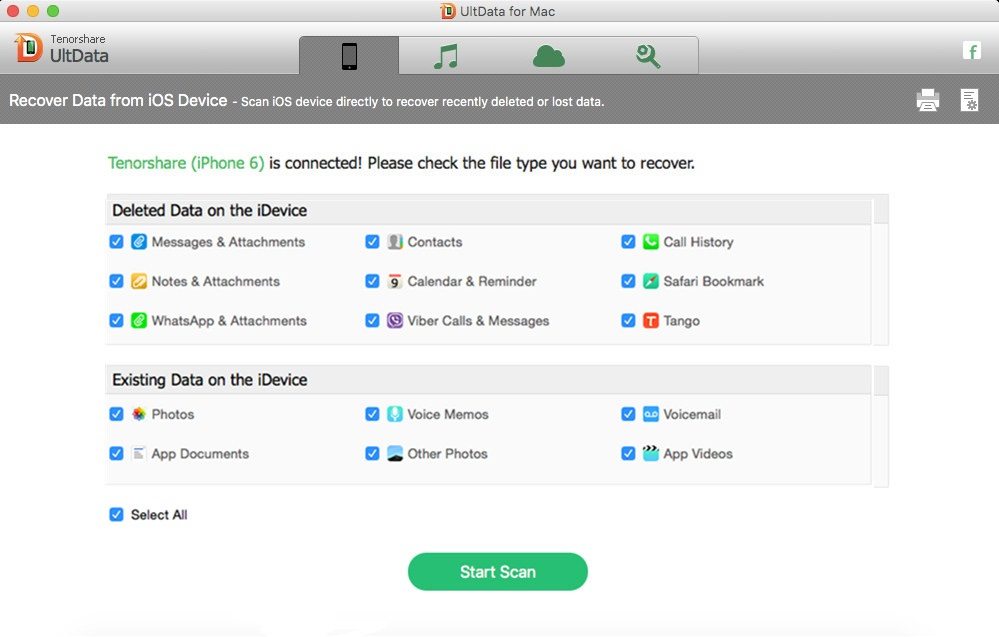
Step 2: Scan iOS Device for Lost Data
After your iOS device connect to the program successfully, you can see all the data type showing in the software interface, including deleted data or exiting data. You are able to choose your target types or select all of them and then click on "Start Scan" button to scan data on your device. And then wait for the software scanning your target data.
Step 3: Preview and recover data from your device
Once the scan is complete, you can see a scan result that all data that you choose to scan are displayed in categories. Data in Camera Roll, SMS Attachments and Videos will be listed in time order for preview, which makes it much easier to find the data you want to recover.
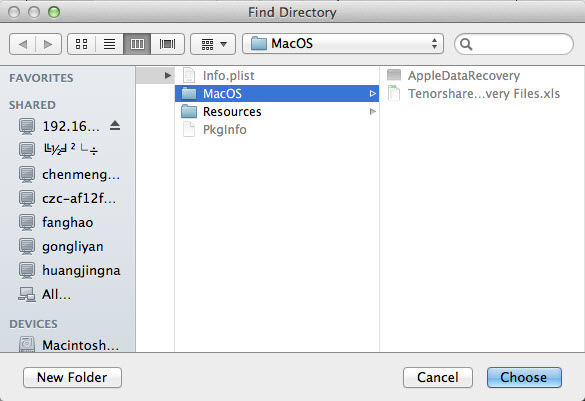
Choose the menu on the left side and preview the content one by one. You can tick any item you want and save it on your computer by clicking on the "Recover" button. A window will pop up requiring you to specify a path to save your recovered files on Mac.
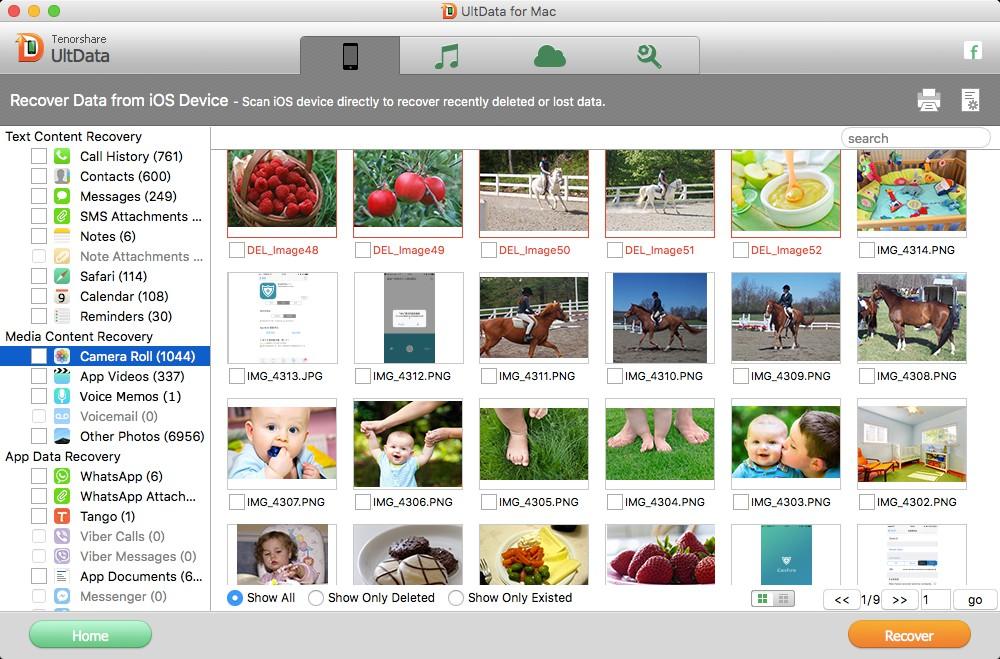
For text content like contacts, text messages, call history, they are saved in .xls, .xml, .txt file (contacts can be saved as VCF/Vcard files as well). For media file (photos, videos, audios), they are saved in their original formats.
Recover Data from iTunes Backup File
This mode help you recover and extract data from iTunes backup. No need to connect your device to computer, which is especially helpful when your device is lost, stolen or severely-damaged.
Note: Don't sync your device with iTunes when you realize that you've lost data, otherwise the iTunes backup file will be updated after the sync.
Step 1: Choose your iTunes backup and scan it
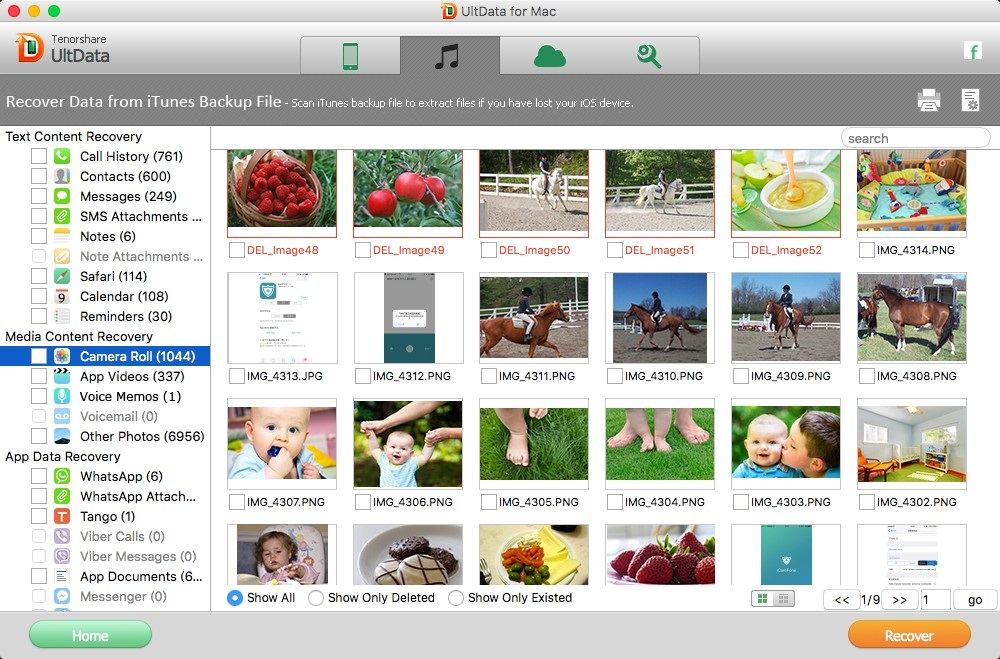
Switch to "Recover from iTunes Backup File" on the top of the primary window, and you'll see the window on the right. Then all your iTunes backup files of your device which has ever synced with iTunes on this computer will be automatically found and listed. Select the one you want and click "Start Scan".

Step 2: Preview and recover data
After a while, all data within the backup file will be extracted and shown in categories. You can preview them one by one before recovery. Then you can check the files you need to recover and click "Recover".
Recover Data from iCloud Backup File
If you have ever backed up your device with iCloud, there is the 3rd way - recover from iCloud backup. It enables you to preview and recover all data in your iCloud backup.
Note: Don't backup your device with iCloud immediately when you find data loss.
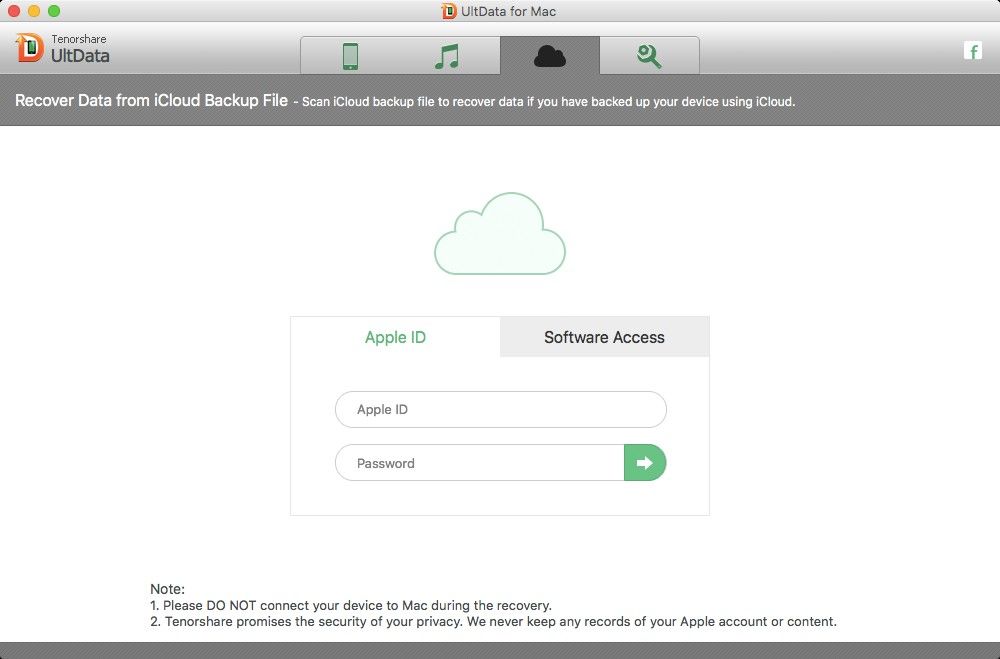
Step 1: Sign in your iCloud
Select the mode of "Recover from iCloud Backup Files" on the top. Enter your iCloud account and password to login and click "sign in". If you once logined in to iCloud on your computer before, you can switch to "Software Access" which enables you to log in automatically without entering your Apple ID and password.
Note: We take your privacy seriously. We never keep a record of any your Apple account information or content at any time during your sessions.
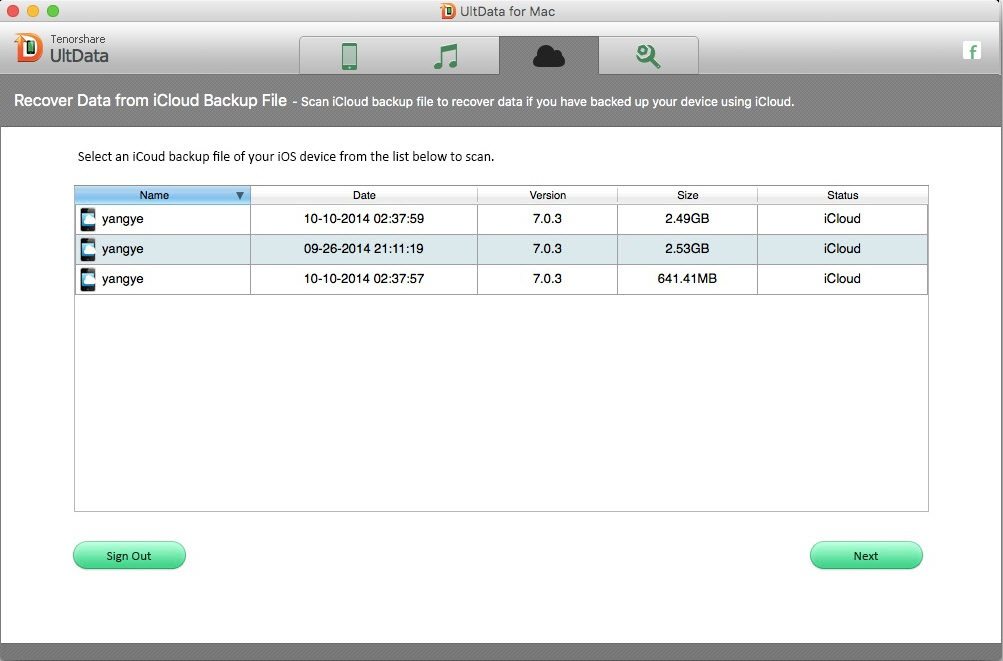
Step 2: Download and scan your iCloud backup
When you logged into iCloud successfully, the program can find all iCloud backup files in this account. Choose the one where you're going to recover data and click the "Next".
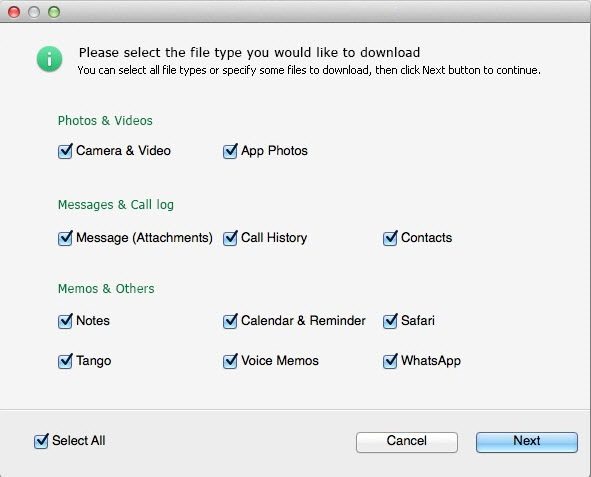
In the next pop-up, choose the type of files you would like to download. This will reduce the time of downloading the iCloud backup file. Click on the "Next" button to begin. It will take you some time for scanning.
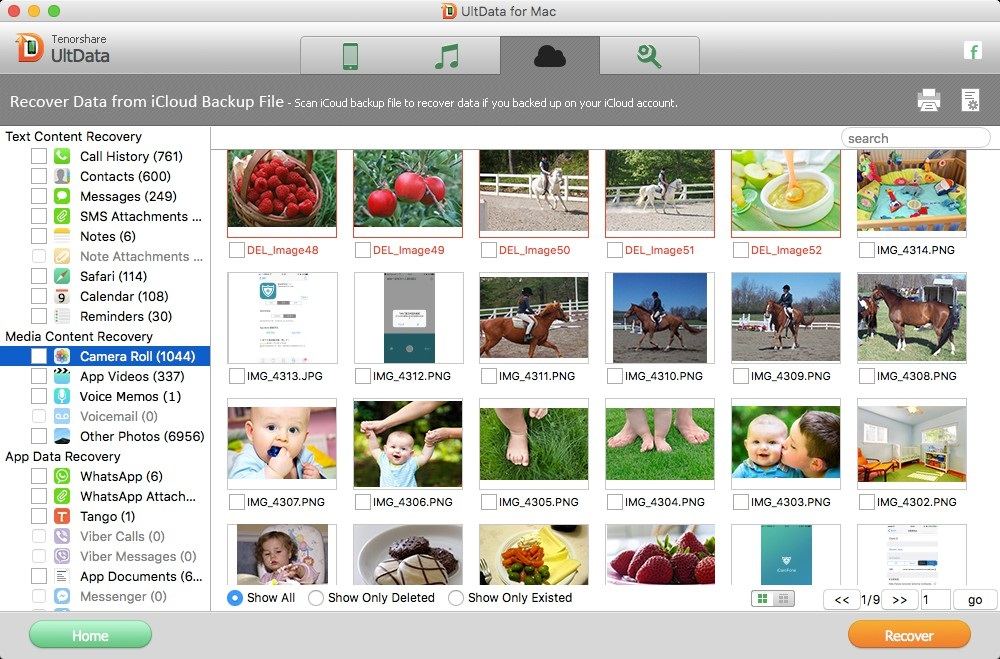
Step 3: Preview and restore data from the iCloud backup
When the scan stops, you can preview all the data in this copy of iCloud backup file. Check them one by one and tick the items you want. Then click "Recover" to save them on your computer.
Sounds Good? Get " UltData (iOS Data Recovery for Mac) " Now!
If you have any questions about this program, please contact us, We provide lifelong technical support and upgrade service.