iPhone 6 Data Recovery for Mac is specially designed for iPhone 6/6 Plus/6s/6s Plus users to recover inexplicably lost or accidently deleted files on Mac including Contacts, Messages, Photos, Notes, Camera Roll, Viber Call, Viber Messages and repair iOS system issues. The following are the step-by-step guide of this amazing tool.
Part 1: Recover Lost Data Directly from iPhone 6 Series
This applies to the condition that you have neither iTunes backup nor iCloud backup and your iPhone 6/6s/6 Plus/6s Plus can be well-connected to Mac. Here we take iPhone 6 for an example to show you the recovery process.
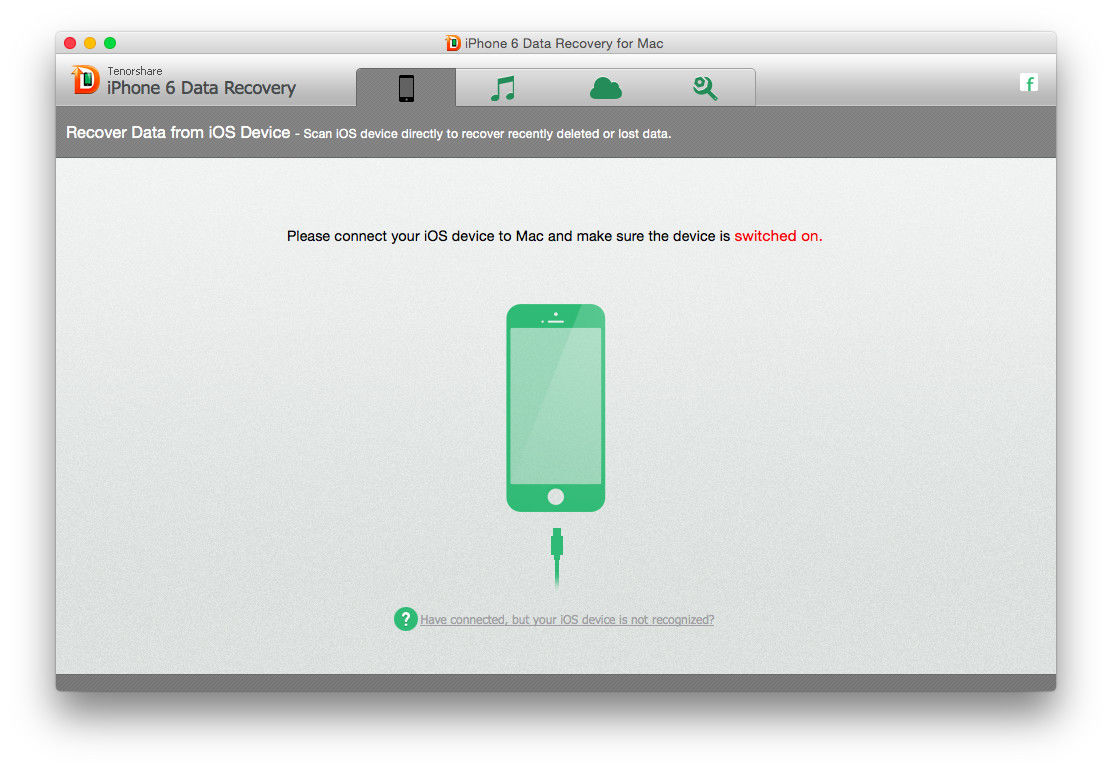
Step 1: Connect iPhone 6 to Mac
Make sure iPhone 6 is well-connected to Mac. Then launch iPhone 6 Data Recovery for Mac software and it will select Mode 1, Recover Data from iOS Device, by default.
Tips:
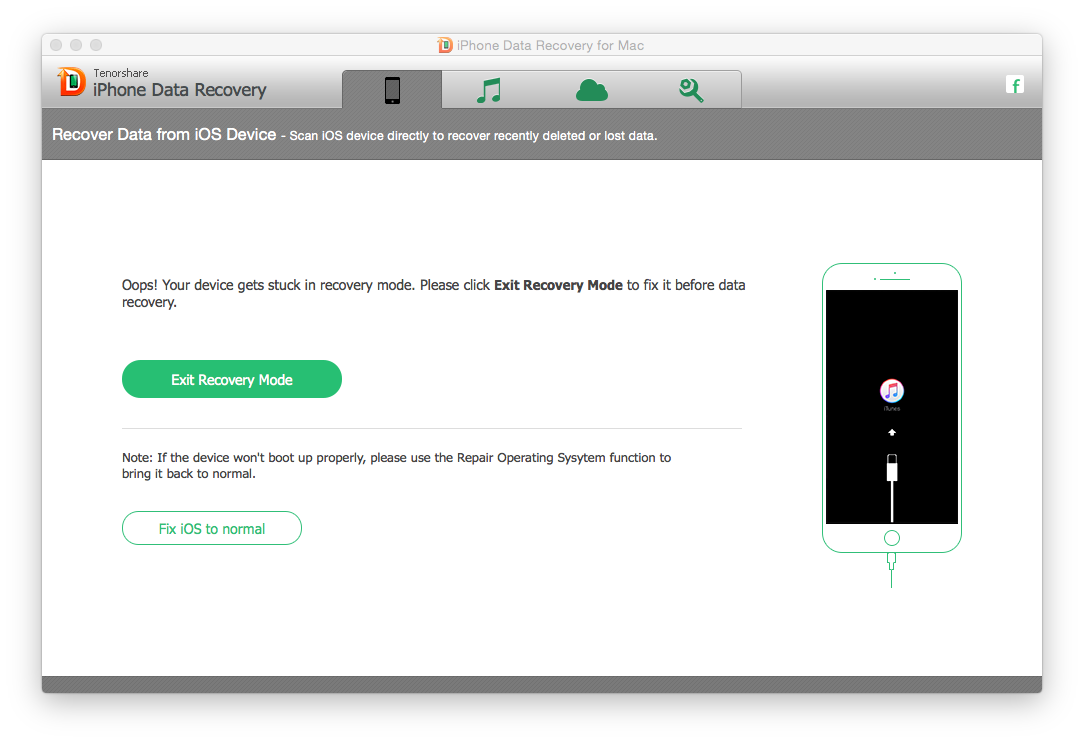
To mention it, if your iPhone 6 screen is black or frozen and won't turn on, you can click “Repair Operating System” to repair iPhone stuck issues
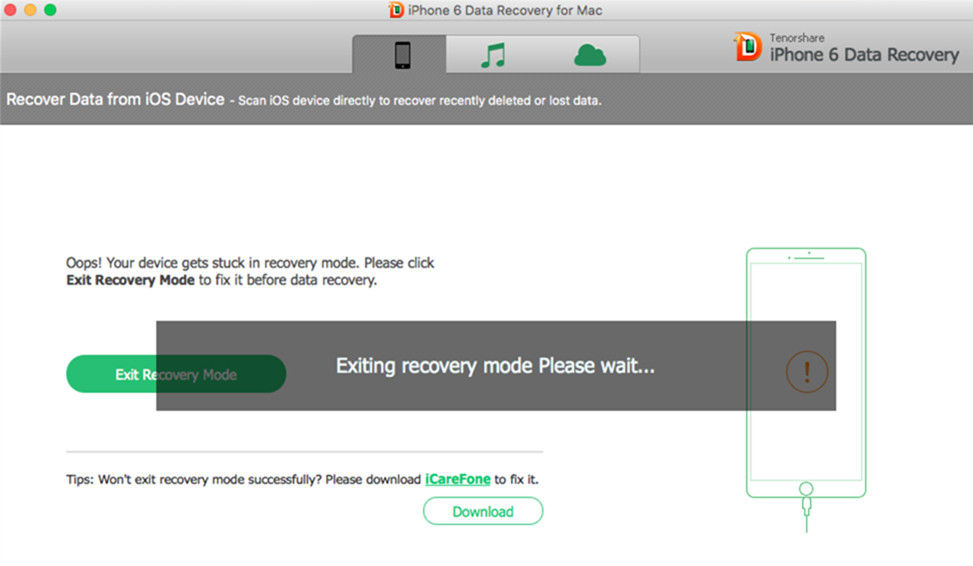
If your iPhone 6 gets stuck at recovery mode, iPhone Data Recovery software provides an easy way to help with you. Just click "Exit Recovery Mode" button to fix it. If that button won't help, you can also click the Download button to download iCareFone, which is a professional tool to fix iPhone 6 stuck.
Now please wait for a while, your iPhone 6 is exiting recovery mode.
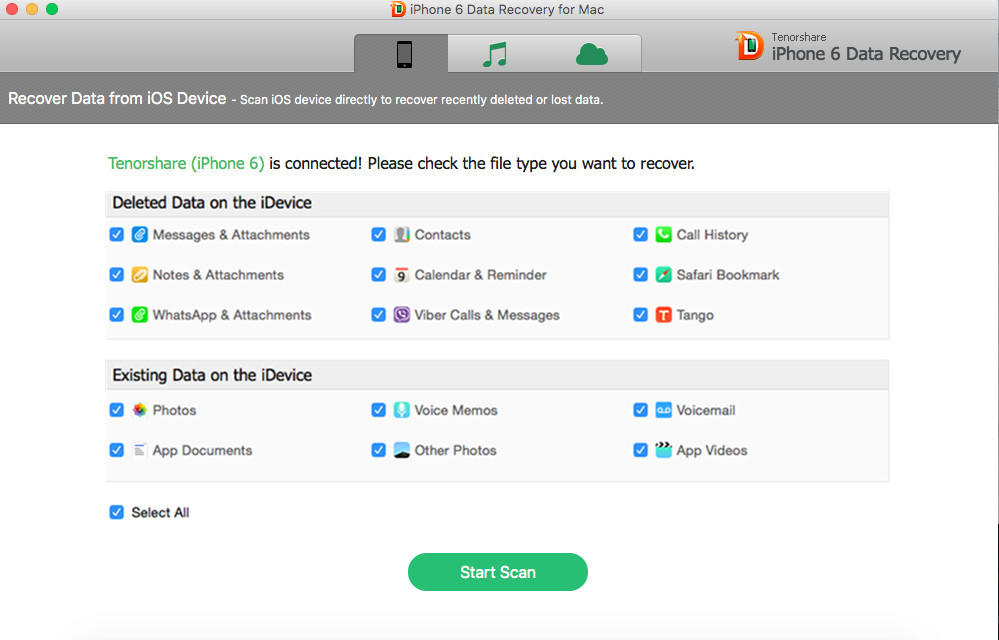
Step 2: Start to Scan iPhone 6 on Mac
After your iPhone connects with this software normally, you will see the existing and deleted data type showing in your iPhone 6. You can choose the item you need to recover or select all of them and then click "Start Scan" in the bottom of the main interface.
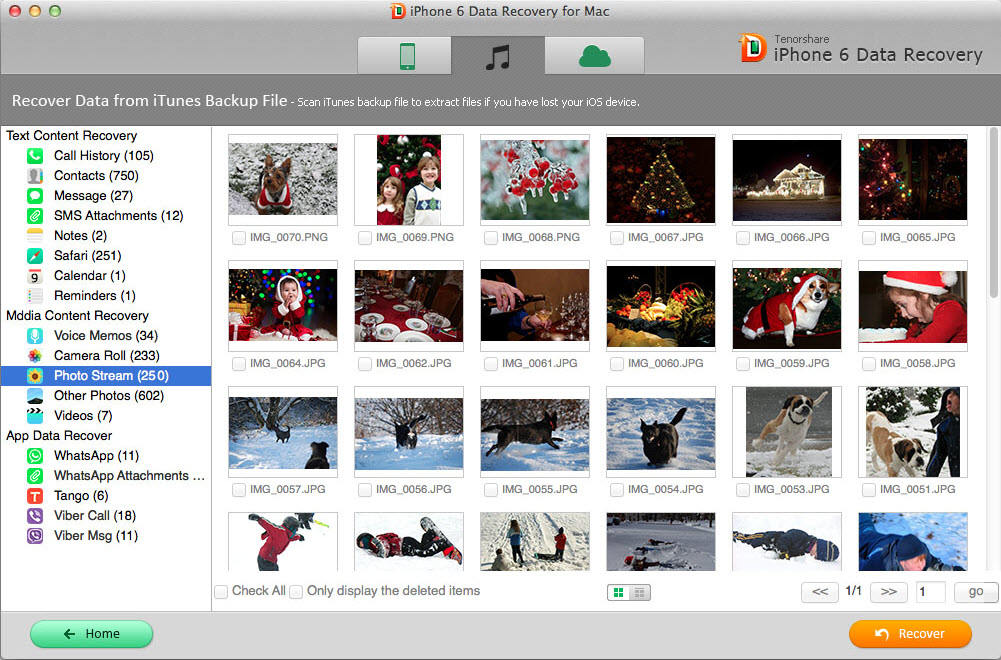
Step 3: Preview and Select Desired Files to Recover
Within minutes, all the scanned files you select will be listed in categories as the picture below. Click on category on the left and preview the detailed information. Select those files you want to get back.
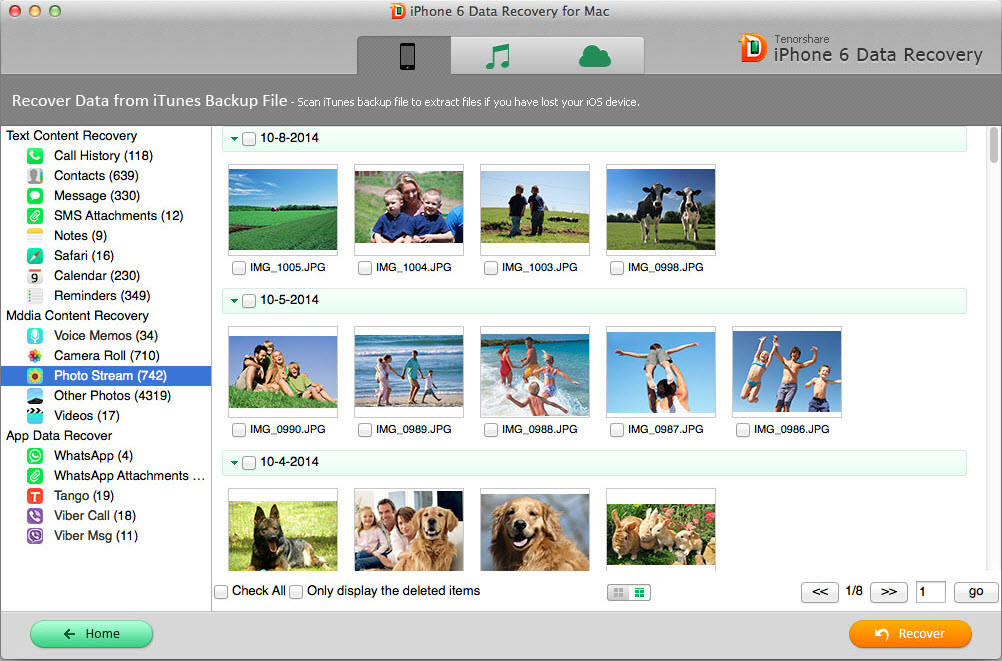
Note: Data in Camera Roll, SMS Attachments and Videos will be listed in time order, which makes it much easier for you to preview and find the certain data you want to recover.
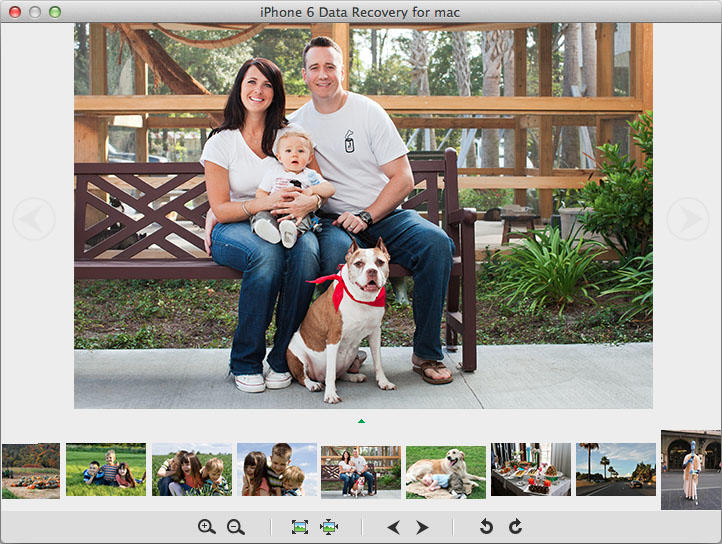
And you can also double click a picture to view it at full size.
Step 4: Recover Desired Data to a Specified Path on Mac
Click "Recover" button and then a window will pop up requiring you to specify a path to save your recovered files on Mac.
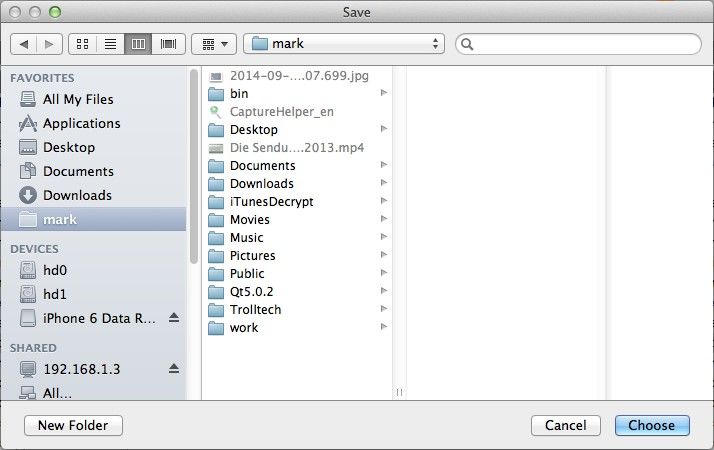
Text files like contacts, text messages, call history, etc. will be saved as .xlsm, .xls or .txt file and media files like photos will be save as its original formats.
Part 2: Recover iPhone 6/iPhone 6 Plus Data from iTunes Backup
This mode only suits those who have previously backed up iPhone 6/6 Plus with iTunes on Mac. Though iTunes backup is a SQLITEDB file which can't be viewed, with iPhone 6 Data Recovery for Mac you can still preview and selectively recover the contents in the iTunes backup.
Note: In the traditional way of recovering lost iPhone 6/6 Plus data, you would result in recover all or nothing.
Step 1: Choose iTunes Backup File and Start to Scan
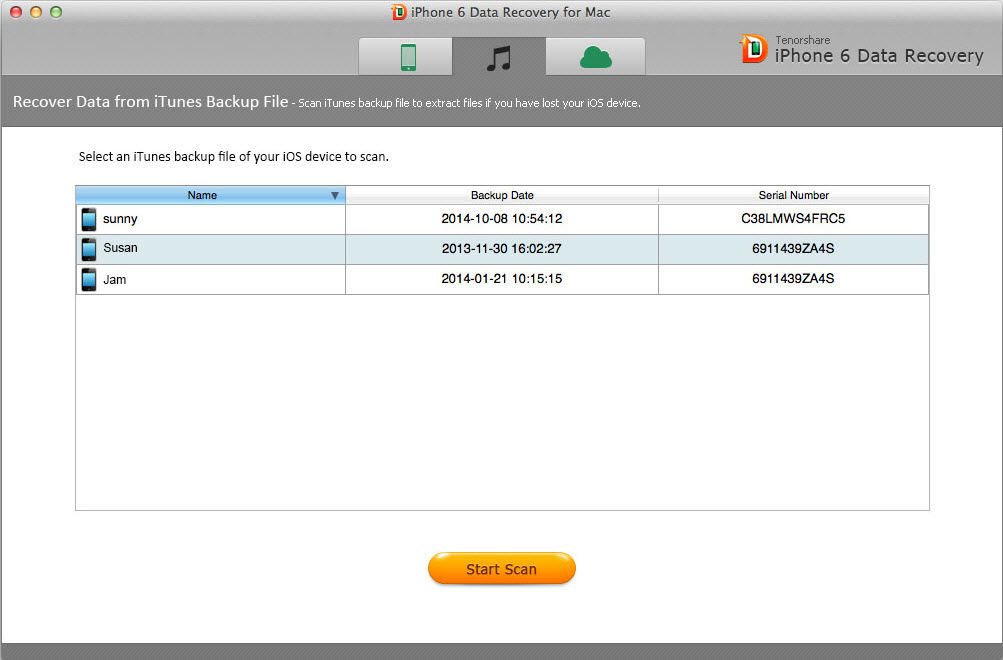
Run iPhone 6 Data Recovery for Mac and switch the primary interface of Mode 1 by default to this mode by clicking the iTunes icon (in the middle of the three icons on the top of interface).
Then the program will automatically detect all backups stored in Mac and display them on the main interface. Choose the one you need and click "Start Scan" to proceed.
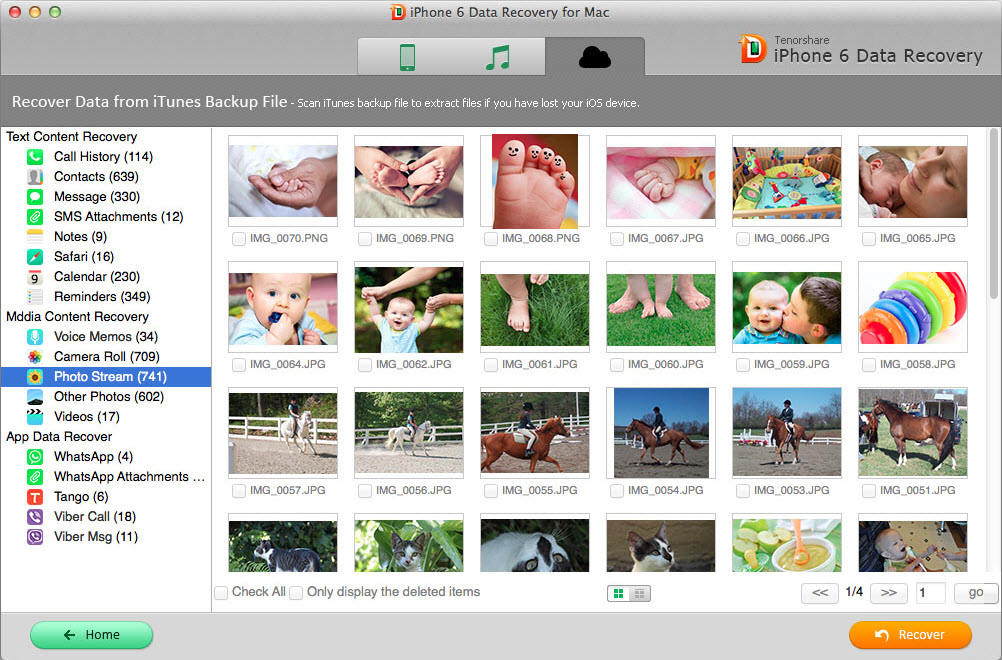
Step 2: Preview the scanned Files on iPhone 6/iPhone 6 Plus
After scanning, all the existing and lost/deleted iPhone 6/iPhone 6 Plus files will be listed in categories like Contacts, Messages, Call History, Photos, etc. Click any category and preview the detailed information.
Check those files that you want to retrieve and click "Recover".
Step 3: Choose a Folder on Mac to Save the Recovered Files
Specify a path in the pop up window to store the recovered iPhone 6/6 Plus data.
Part 3: Recover iPhone 6/iPhone 6 Plus Data from iCloud Backup
Likewise, this mode requires that you've synced your iPhone 6/iPhone 6 Plus with iCloud before.
Step 1: Login in iCloud Account and Download the Specific Backup to Mac
Launch iPhone 6 Data Recovery for Mac and switch the primary interface of Mode 1 by default to this mode by clicking the iCloud icon (rightmost of the three icons on the top of interface). Then you'll get the interface below.
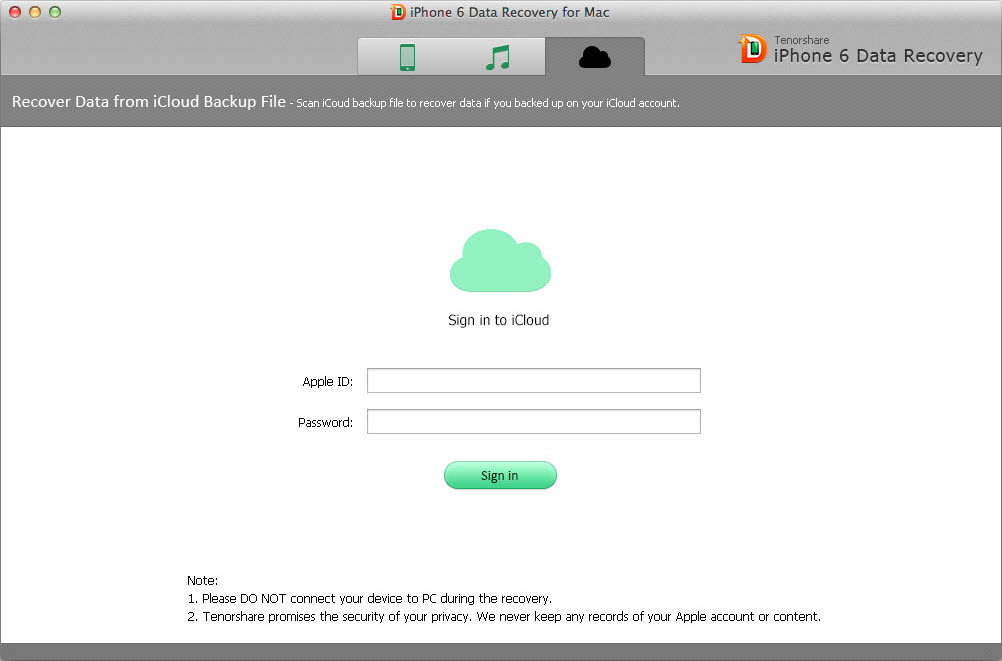
Enter your Apple ID and Password to login in iCloud Account. Then a window will pop up requiring you to download iCloud backup to Mac.

You can either download all or check some certain files that you need. Then click "Next" to initiate download process.
Step 2: Scan and Preview all the Data Stored in iCloud Backup
After downloading, iPhone 6 Data Recovery for Mac will automatically scan the detailed contents stored in the iCloud backup. Then preview the scanned files listed in categories.
Step 3: Recover Needed Data to a Desired Folder on Mac
Check your needed data and click "Recover" to restore your desired iPhone 6 or iPhone 6 Plus data. Then a window will pop up requiring you to choose a folder to save those recovered files on Mac.
The 3 Modes mentioned above assure you that iPhone 6 Data Recovery for Mac can recover lost or deleted iPhone 6/iPhone 6 Plus files with security and efficiency.
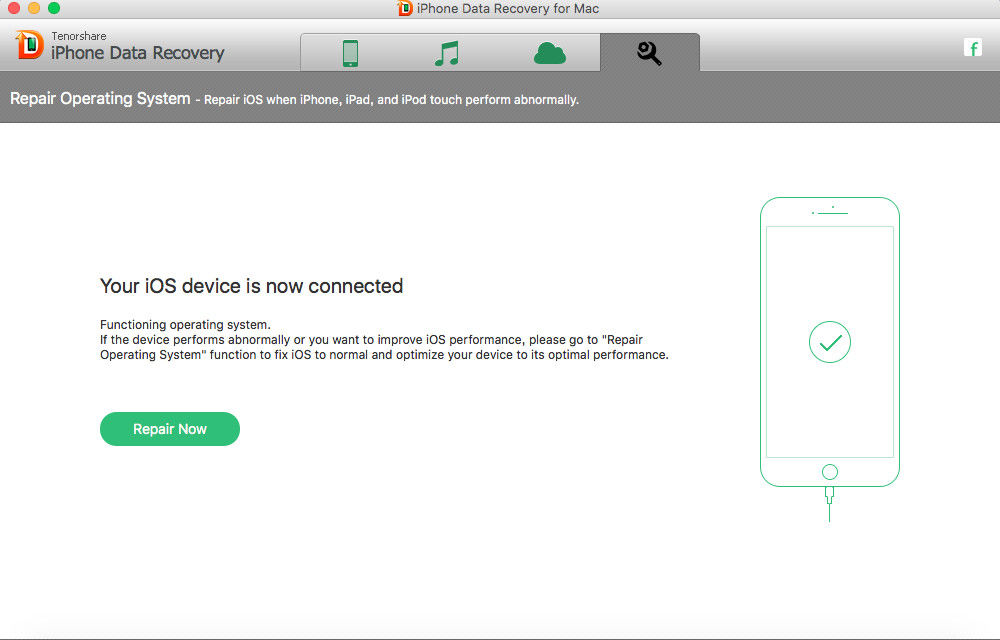
Part 4: Repair Operating System
iPhone 6 Data Recovery provides an easy way to download firmware to fix iOS crash, upgrade failure and any iOS stuck issues. No Data loss. No jailbreak. If your iPhone works abnormal, you can fix the operating system with this tool.
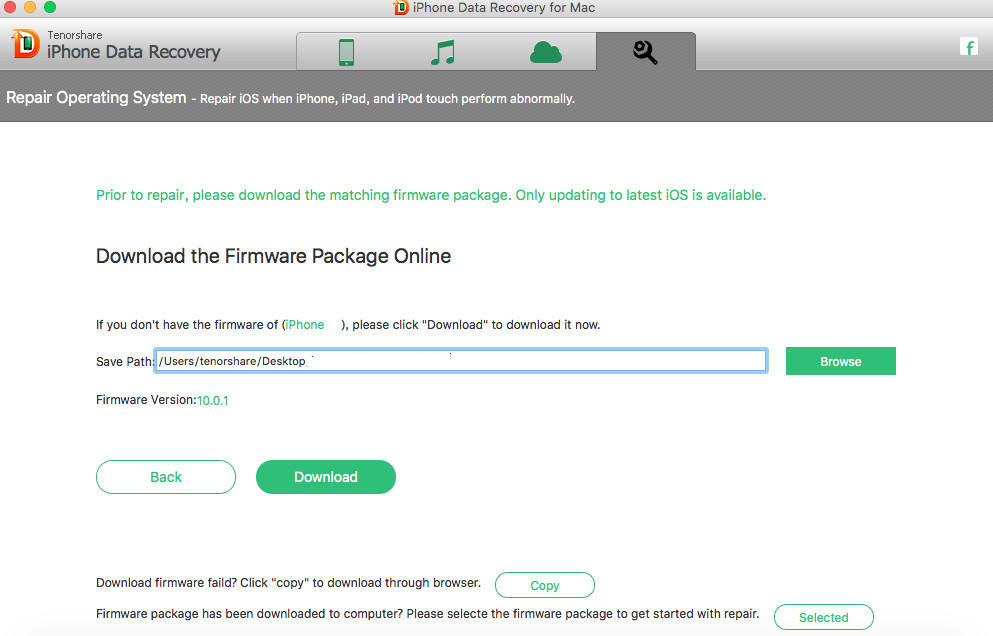
Step 1: Connect iPhone to computer and choose “Repair Operating System”, press “Repair Now” button and choose a disk to save the firmware after downloading.
Note:
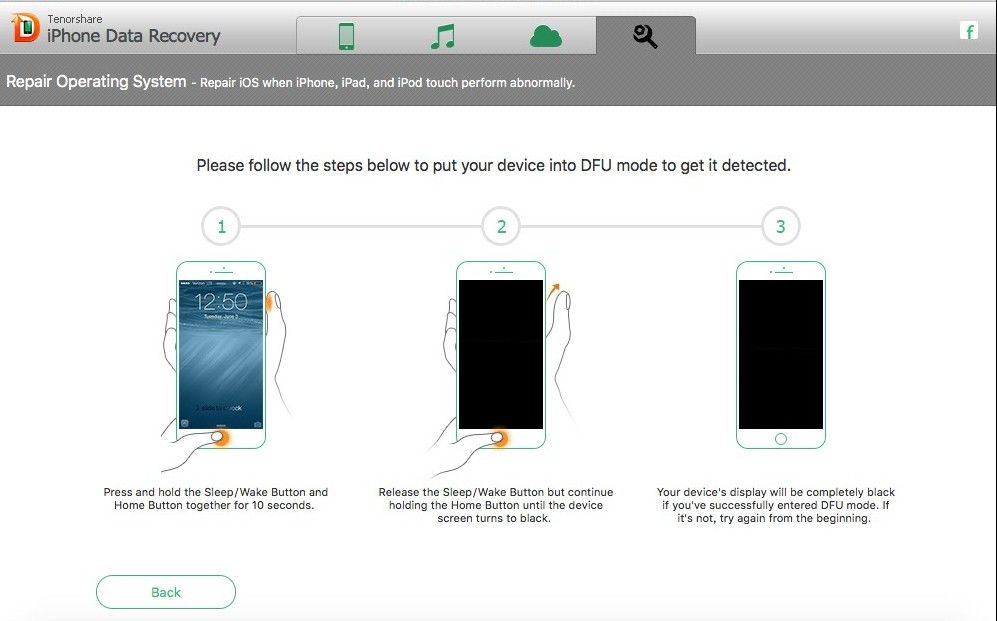
If your iPhone cannot be detected, you need to put it into recovery mode. Click “Start” and you’ll see the steps to recovery mode. If you failed, you can click “enter DFU mode” to get your device detected.
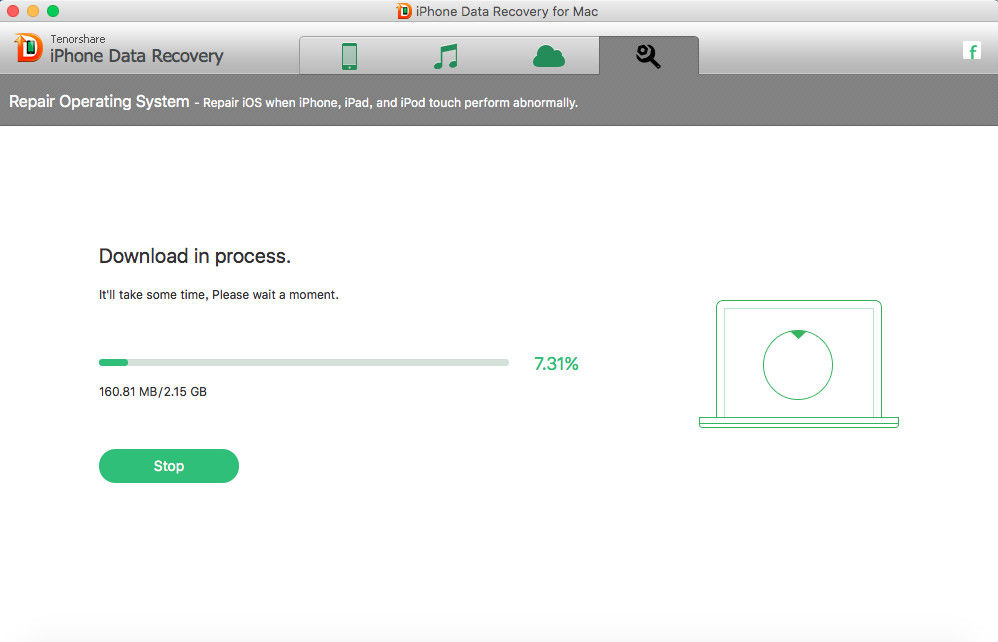
Step 2: Click “Download” button to download the firmware package. Make sure your device is well connected during the process and do not use it.
Note:
1. If download firmware failed, click “Copy” to download from the browser.
2. If you have already downloaded it to your computer, click “Select” to import the package manually.
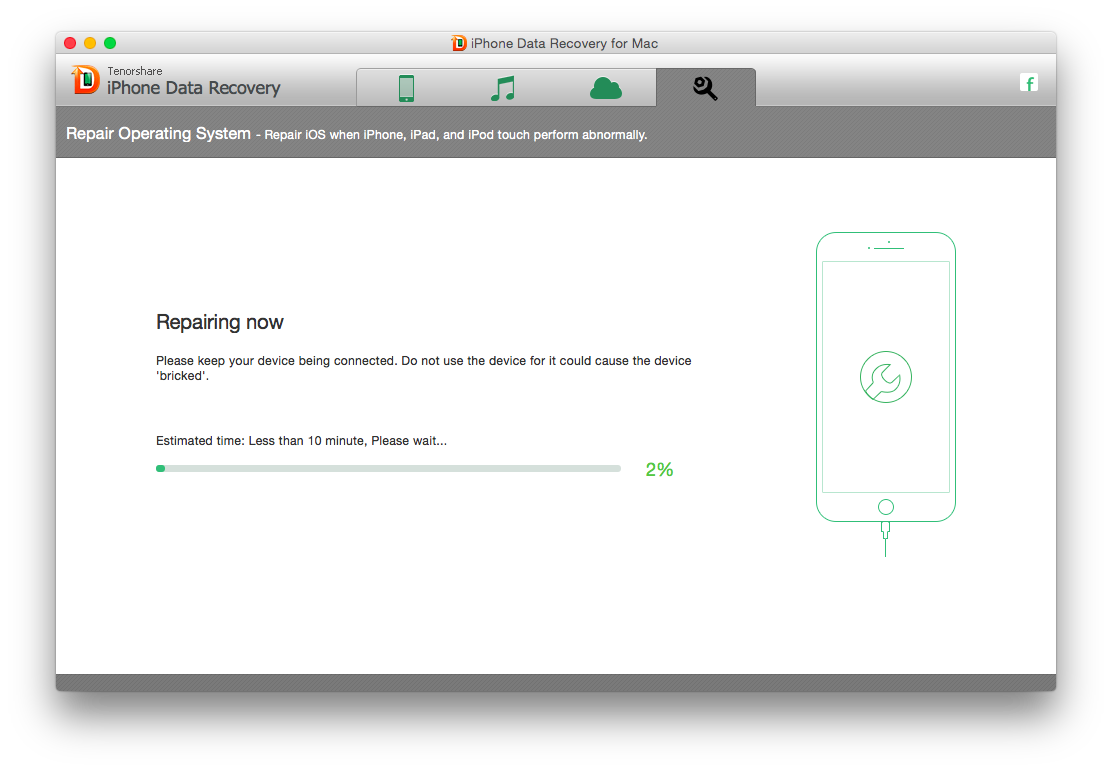
Step 3: After downloading, the software will start repairing your device automatically. The repairing process will take a while, when it finished successfully, you can see a notice informing you the iOS system repair is done.
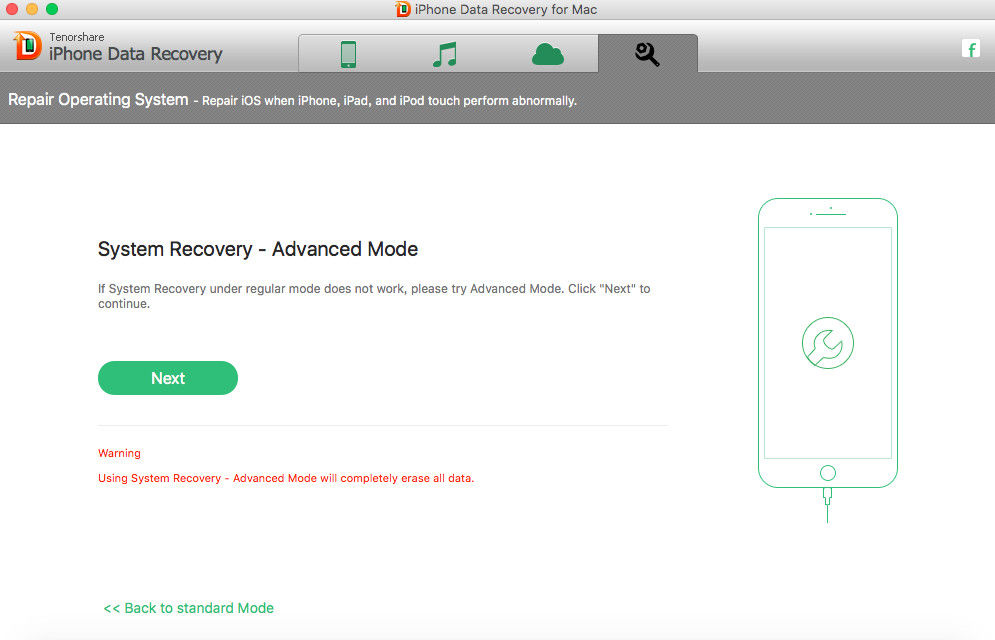
If the repairing process failed, you can see the notice asking you to repair system again or feedback your issue. You can always choose advanced mode to repair system when the standard mode not worked, but that will erase all the data on your device.
The 4 parts mentioned above are the main functions of iPhone Data Recovery, if you like it, just download to your computer to get a clear understanding.
Sounds Good? Get " iPhone 6 Data Recovery for Mac " Now!
If you have any questions about this program, please contact us, We provide lifelong technical support and upgrade service.