Windows 7 system has a default administrator account that is created during the installation of Windows 7. Log as built-in admin account you will have complete access to the computer and can make any desired changes such as reset forgotten Windows 7 password for other accounts and will not be prompted by UAC.
By default, the built-in administrator account is named Administrator, and is disabled. In this article, we will introduce 3 methods for you to enable or disable the hidden/built-in elevated Administrator account in Windows 7.
Method 1: Enable or Disable Built-in Administrator through Computer Management Console
You can easily enable Windows 7 built-in administrator through Computer Management Console. But this method only applies to Windows 7 Professional, Ultimate, and Enterprise editions.
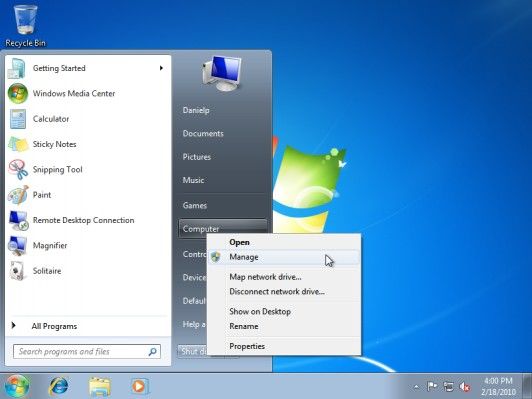
- Right-click on the Computer icon on your desktop and select Manage as shown in the image below.

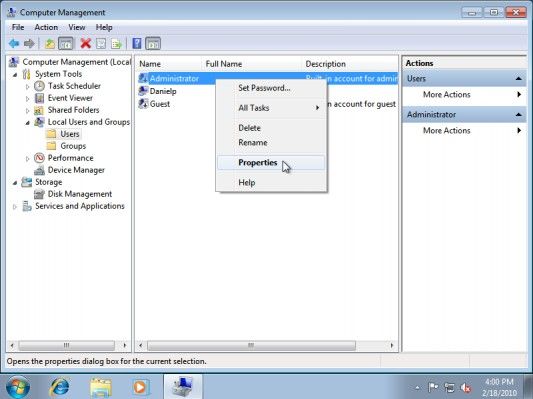
- The Computer Management screen will now open. Expand the System Tools folder, then the Local Users and Groups folder, and finally single-click on the Users folder. In the right hand pane you will now see a list of the accounts on your computer, including the Administrator account.
- Right-click on the Administrator account and click on the Properties menu option and the Administrator Properties screen will now open.

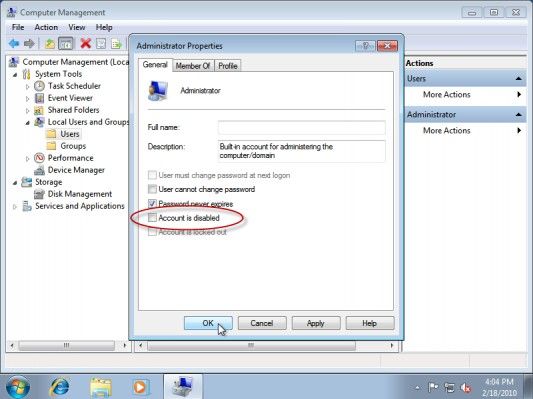
- To Enable the Built-in Administrator Account in Windows 7, uncheck the Account is disabled box, click on OK.
- To Disable the Built-in Administrator Account in Windows 7, check the Account is disabled box, click/tap on OK.

- Close the Local Users and Groups window.
Method 2: Enable or Disable Built-in Administrator through Elevated Command Prompt
To enable the built-in Administrator's account by using the Command Prompt, you can follow steps below:
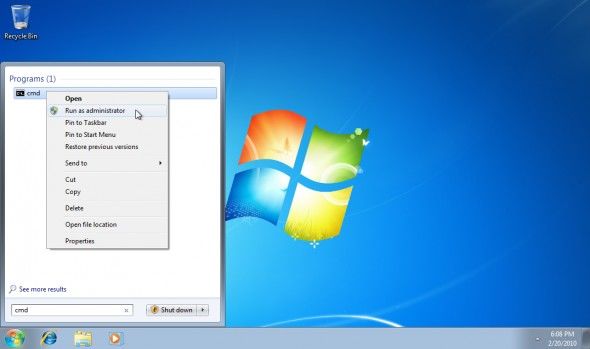
- Click Start and type CMD, then press Enter. It is best to run the Command Prompt as an Administrator. To do so, right click CMD and select "Run as Administrator".

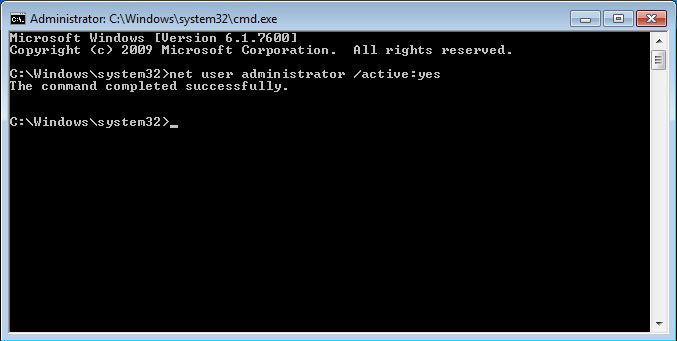
- To Enable the Built-in Administrator Account in Windows 7, copy and paste the command below and press Enter.
net user administrator /active:yes

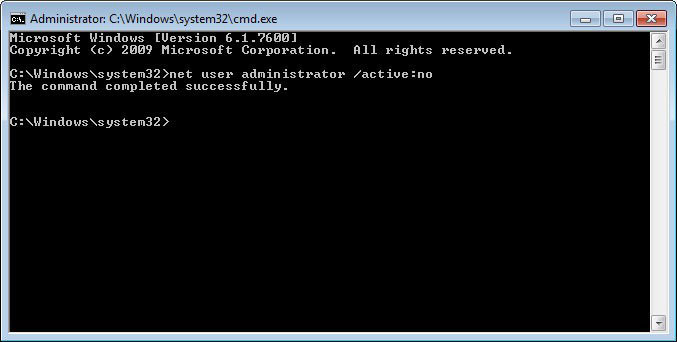
- To Disable the Built-in Administrator Account in Windows 7, copy and paste the command below and press Enter.
net user administrator /active:no

- Close the elevated command prompt.
Method 3: Enable or Disable Built-in Administrator through Local Security Policy
- Press the Windows + R keys to open the Run dialog, type secpol.msc, press Enter.
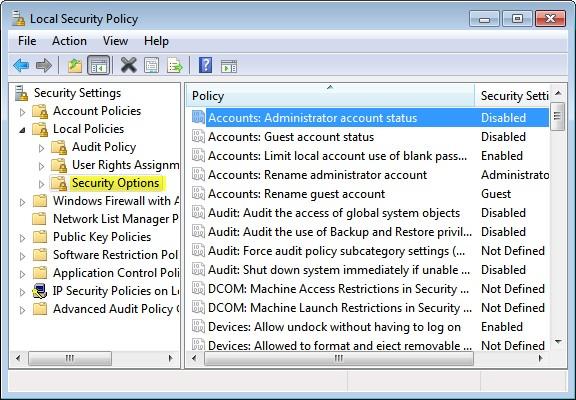
- In the left pane, expand Local Policies, and click on Security Options.
- In the right pane, right click on Accounts: Administrator account status and click on Properties.

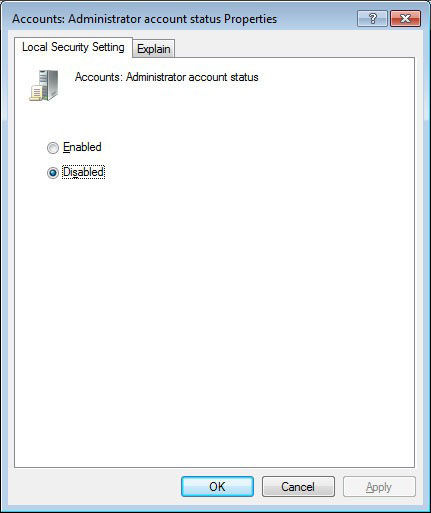
- To Enable the Hidden Built-in Elevated Administrator Account, select (dot) Enabled.

- To Disable the Hidden Built-in Elevated Administrator Account, Select (dot) Disabled.
That's for how to enable or disable the built-in Administrator account in Windows 7. For Windows 8/8.1, you can read another article - how to enable or disable the hidden built-in Administrator account in Windows 8 and 8.1.
World's 1st Windows Password Recovery Software to Reset Windows Administrator & User Password.
Free Download Free Download